Here are the steps to setup your system for the 'write-off' window.
From the main directory, select number 8 (File and system management), then number 1 (set the main control settings). You will see this window after you click on the 'Data Entry' tab:
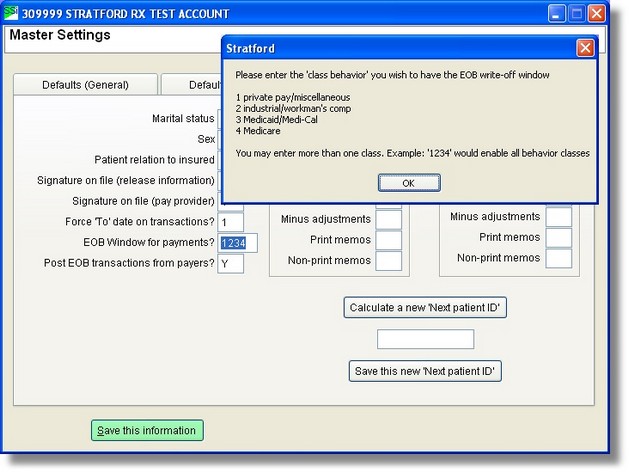
Note the text box labeled: EOB Window for payments. Here you can enter the code for the financial class behavior that you want to use the EOB window. Here are the codes:
1. Private pay/miscellaneous
2. Industrial/workman's copy
3. Medicaid/Medi-Cal
4. Medicare
In the example above, you see '1234' has been entered. This means that the write-off window will show for all financial classes in all class behavior types.
Next, click on the 'Labels' tab and you will see this window:

Look at the section on the right side labeled: 'Auto-Write-off window'
There are 6 text boxes which contain the lookup codes for 6 auto-transactions that you can setup. If you do set these up, the write-off window will be able to automatically enter transactions for you. The codes you see above are the standard codes that appear in all new accounts - at least those with the standard data recommended by Stratford. If you do not have these codes, you can get help from Stratford support. You are certainly free to modify these codes and/or the transactions if you want different wording. For example the Write-off adjustment (code: MC:W/O) will create a transaction that says: "Pat is resp for $18.99" (18.99 would be replaced by the amount of your write-off adjustment). If you do not want the adjustment to have this wording, you can change it.
Last, check the auto-transactions to be sure they have the codes that you put in the master settings (above). From the main directory select #8, then you will see this menu:
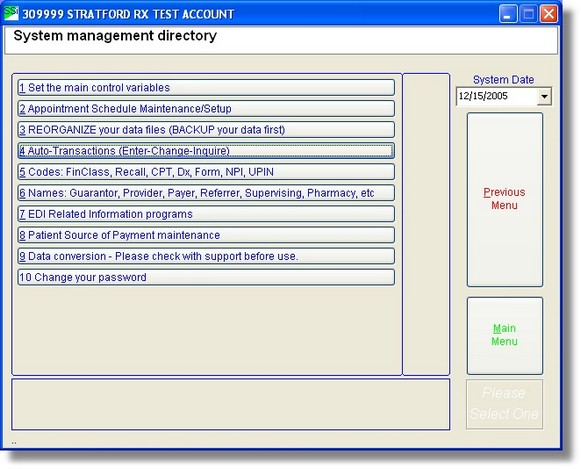
From this menu select #4 (Auto-transactions (Enter-Change-Inquire) and you will see the auto-transaction lookup screen. Press the 'Find' button with nothing entered in the text boxes at the top and you will see all your auto-transactions listed as below:
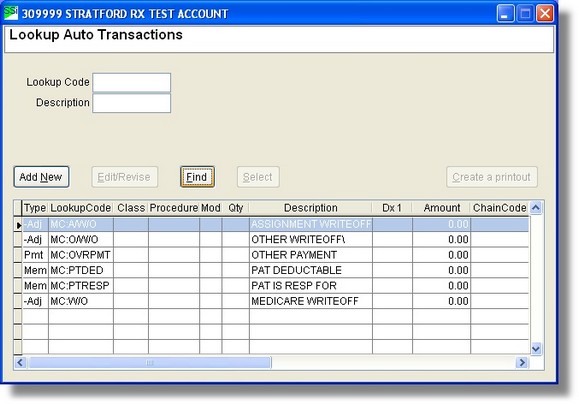
If you do not have these, you can enter them now. Remember that:
| • | -Adj is transaction type '4' |
| • | Pmt is transaction type '2' |
| • | Mem is transaction type '5' |
If, for some reason, you do not want any of these transactions to be automatically entered from the 'Write-off' window, simply delete the auto-transaction.
If you already have patients entered into your database, the EOB write-off window may still not work. The reason is that the window must be activated in every patient. You can do this automatically by coding the financial class window. Then when new patients are entered, they will automatically get the write-off function just as they will get other defaults built into the financial class. Here is an example of how to set up the EOB write-off window for a financial class that we named "MEDICARE' Here is the financial class window that you will see anytime you enter a new patient:
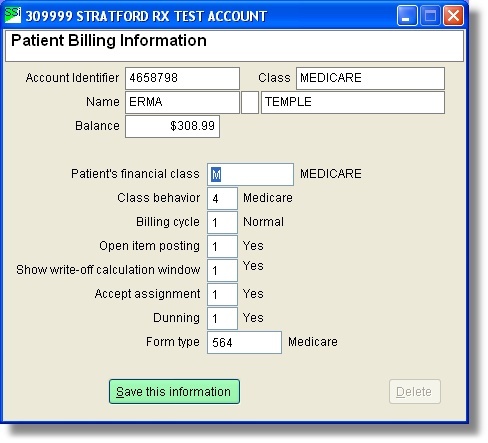
Note that window shows 'No' in the text box labeled 'Show write-off calculation window'. We can change this to 'Yes' by entering 'Y' or '1' in that box. You can also right-click and select from a small menu:
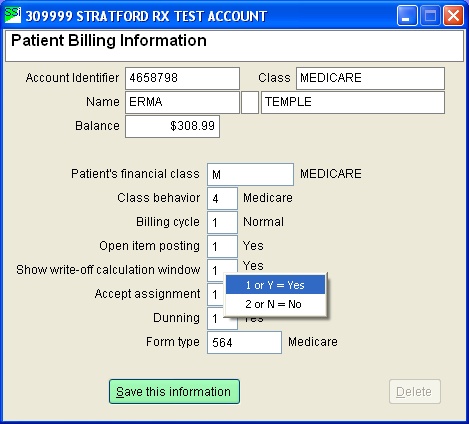
This will change this one patient so the EOB write-off calculation window will show on this one patient.
In order to make the change for all patients that you enter in the future, you need to change the financial class template screen. You can access this screen from the main directory by selecting #8. Then you will see the submenu:
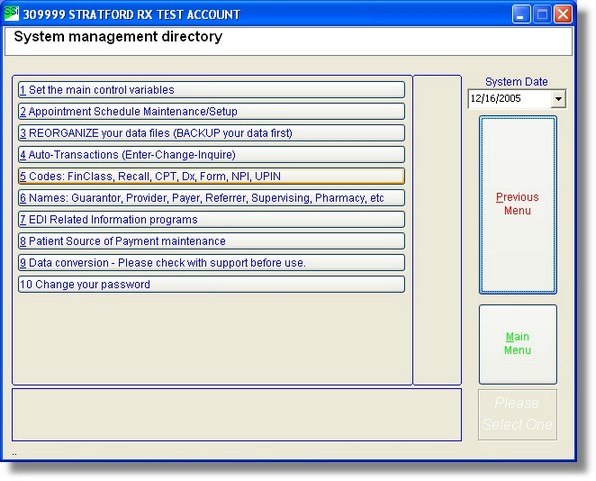
Select #5 (Codes: FinClass....), then select #8 (Patient Financial Class Setup)
From the Financial Class lookup window select the financial class you want to change (or enter a new one). Note this screen looks very much like the patient financial class screen (above) except this is a template to be used when entering a new patient:
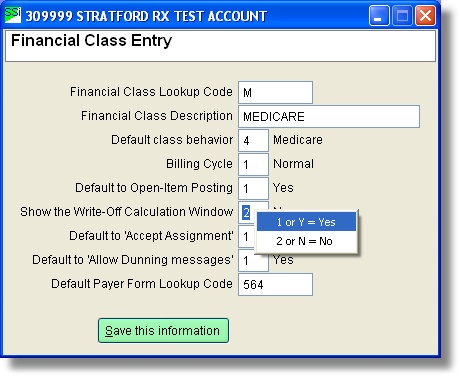
Note that this screen is never used in the system for billing. It is only a template to create defaults for you while entering a new patient - that way you will not have to remember how to fill out the screen each time you enter a patient. In fact, you will not even need to look at this screen. You will see the financial class lookup window. You can highlight the class you want and press select and the patient is automatically setup. If you remember the lookup code ('M' in the example above) you won't even need to see the financial class lookup window. You can simply enter 'M' while entering a new patient. Try it!
Note: after saving the information above, you will see this question:
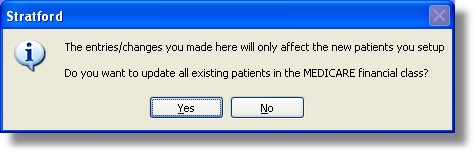
If you click the 'Yes' button, Stratford will change all existing patient's matching financial class so that they have the same values.
1. Note: no changes will be made to any financial classes other than the specific type you are editing.
2. Note: if you have entered even one transaction of any type for a patient, the setting regarding 'open-item' posting cannot be changed for that patient.
After you have the EOB write-off calculation window setup, you will be able to enter several transactions entered automatically. See the example below:
Example of the use of the EOB Write-Off calculation window
For your patient Erma Temple you have billed a CPT code 99214 for $100.00 to Medicare.
See the 3rd service line on this patient's transaction screen:
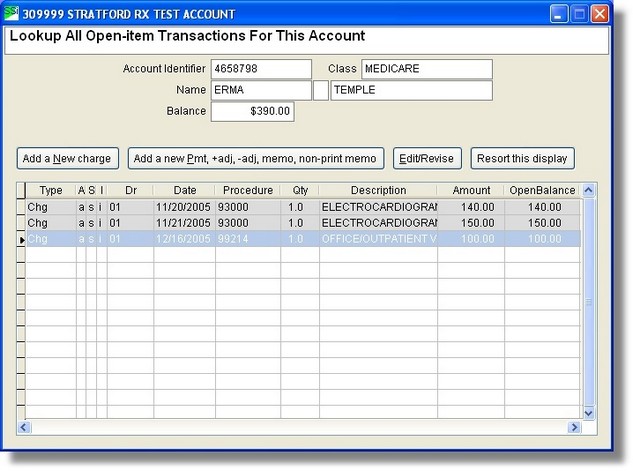
You received a check from Medicare for $75.96 along with their usual EOB (Explanation Of Benefits).
First post your payment by highlighting the 3rd service line and press the button labeled 'Add a new Pmt, +adj ..... You will see this screen:
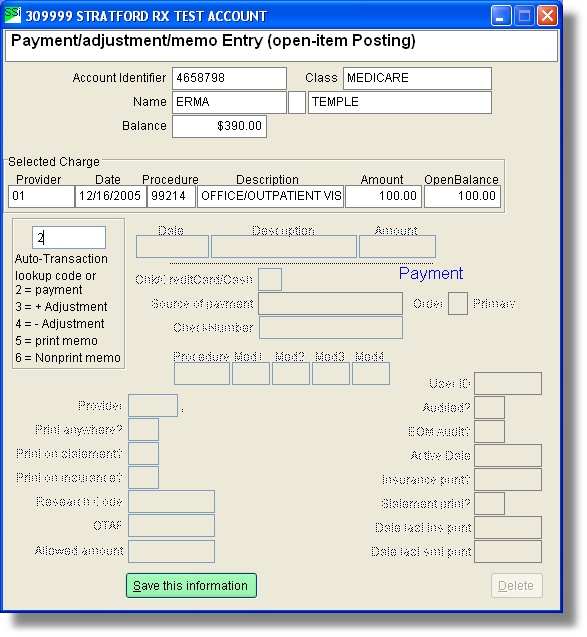
Enter '2' for the type (payment) of transaction (or if you have an auto-transaction setup you can enter its code here). For the description you can enter Medicare payment and for the amount enter $75.96. Then for the source of payment (Chk/CreditCard/Cash) enter '1' (or you can right-click and select from the small menu). Press tab to move on and you will see a small question dialog asking you if the patient's insurance is the source of payment:
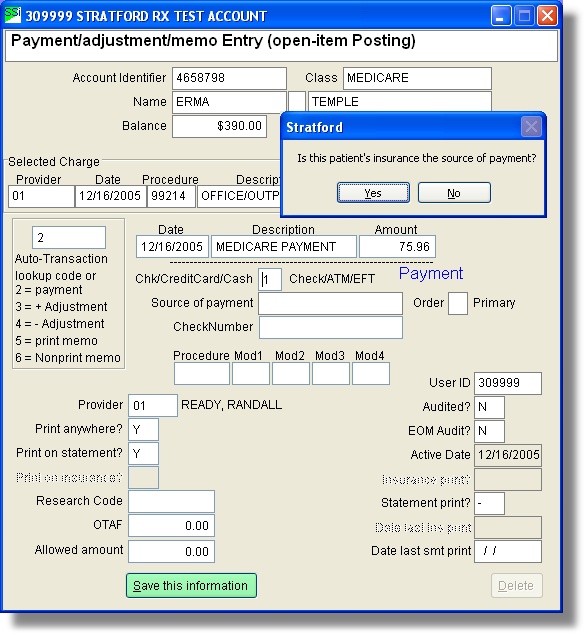
If you click Yes, you will see a list of this patient's insurances so you can select which one sent you the check. Since you only have one insurance for this patient, you will not get the list, but instead the screen will show MEDICARE and move on to the text box labeled 'CheckNumber'. Here you can enter the check number, a memo or leave it blank:
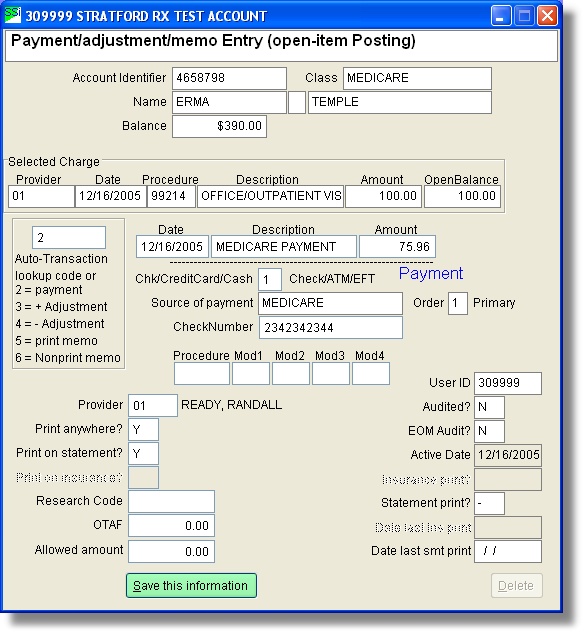
Press the 'Save this information' button and you will see the EOB write-off screen:
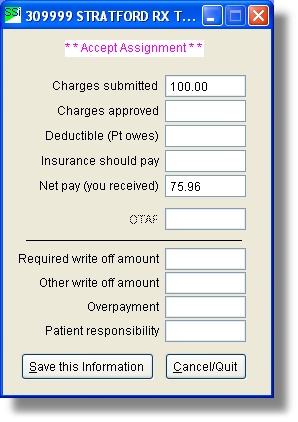
On the EOB that you got from the payor (MEDICARE in this example) states that they approve $94.95 for this CPT code for you.
1. Enter 94.95 in the text box labeled 'Charges approved' and press TAB on your keyboard.
2. In the 'Deductible text box, do not enter anything, just press TAB again.
3. $75.96 will automatically appear in the 'Insurance should pay' text box.
4. 5.05 will automatically appear in the 'Required write-off amount' text box.
5. 18.99 will automatically appear in the 'Patient responsibility' text box.
You will see this screen:

When you press the 'Save this information' button, the program will automatically enter 2 transactions after your payment:
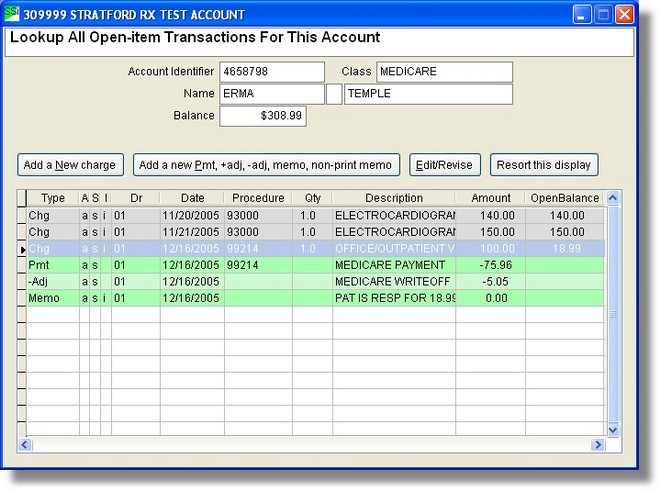
1. $5.05 -Adjustment because the EOB tells you that you cannot collect this amount - it is the difference between the amount you billed and the amount the payer allows:
100.00 |
Amount you billed |
- 94.95 |
Amount allowed |
5.05 |
Amount you must write off |
2. A memo transaction telling you that the patient's responsibility is $18.99
100.00 |
Amount you billed |
- 75.96 |
Amount paid by the payer |
- 5.05 |
Amount you must write off |
18.99 |
Amount the patient is responsible for paying |
You will have this memo in the patient's account transaction ledger (above) so you can tell the patient by sending a statement, calling, emailing or whatever you do in your office.